
Who Do You Think You Are?
Who Do You Think You Are? Magazine is produced by the BBC. Click here to subscribe.Get started with TreeView
Nick Peers reveals how to make the most of TreeView's online features
Regardless of which major online archive you subscribe to, there's a program out there that can simplify the task of incorporating your family's records from that site into your tree. TreeView is a program for Mac and Windows that integrates with TheGenealogist's archives and online tree builder to give you easy access to its records and provide you with a place to store your tree online.
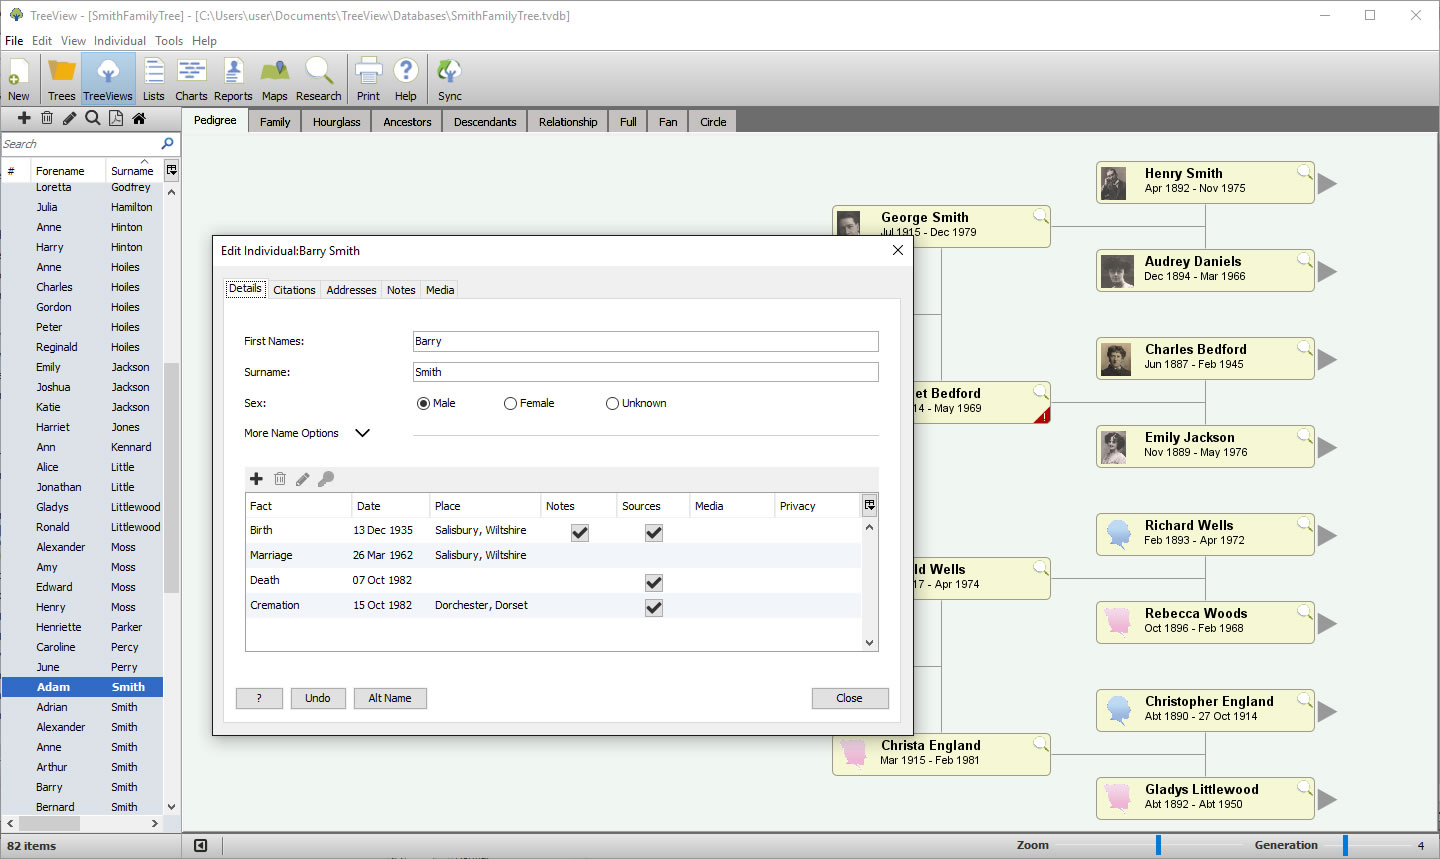
TreeView provides all the core functionality that you need to build and maintain your family tree.
It works in a similar way to Family Tree Maker and Ancestry.co.uk – so we've focused our step-by-step guide on understanding how to make the most of these features. The rest of TreeView's functions will be familiar to those who have any experience with similar family history tools, where you build your tree, attach facts, photos, sources and more to individual family members. You can view your tree in various ways, see your kin's haunts on a map, plus generate charts and lists. The program also comes with a number of handy tools – see the box below for one of these, but also look out for the relationship and soundex calculators, the latter helping you discover phonetic variations of your family's surnames.
You can download a full functional 30-day trial of TreeView from TreeView.co.uk – both Mac and Windows versions are available. The Basic Edition costs £24.95, or purchase the Premium Edition on CD for £39.95, which includes a four-month Diamond subscription to TheGenealogist.co.uk.
TOP TIP! Look for a red exclamation mark next to any people in your tree – this indicates TreeView has found a potential problem. Click the mark for details of what it's found – if it's a genuine issue, you can investigate further, or mark it as not a problem if TreeView has made a mistake.
Build and maintain your family tree
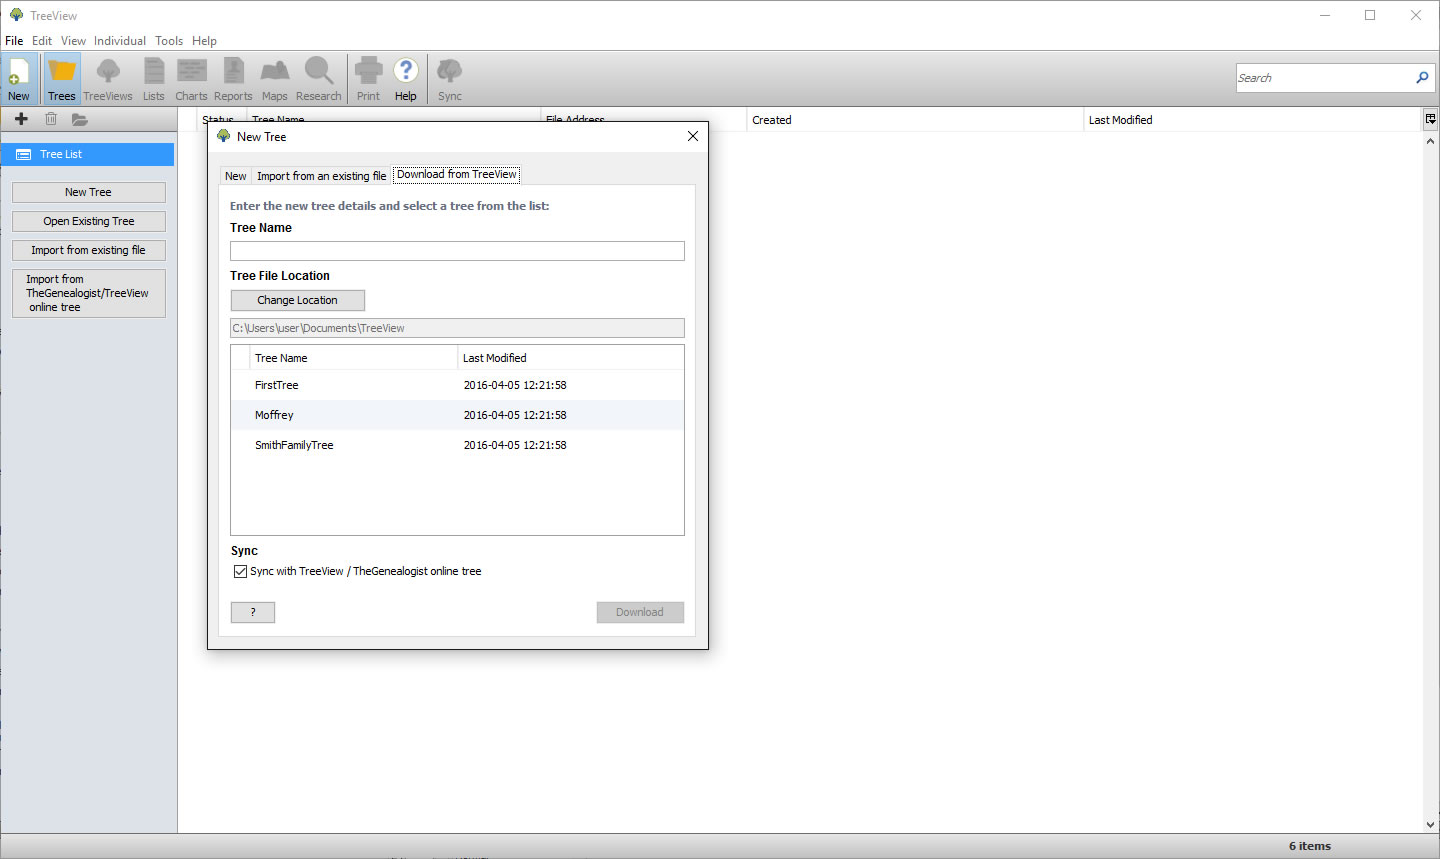
1. Download Tree
Launch TreeView – choose 'Import from TheGenealogist/TreeView online tree' to download an existing tree. Enter your login details for TheGenealogist.co.uk then select your online tree. Click 'Change Location' to choose where to store it, then click 'Download'.
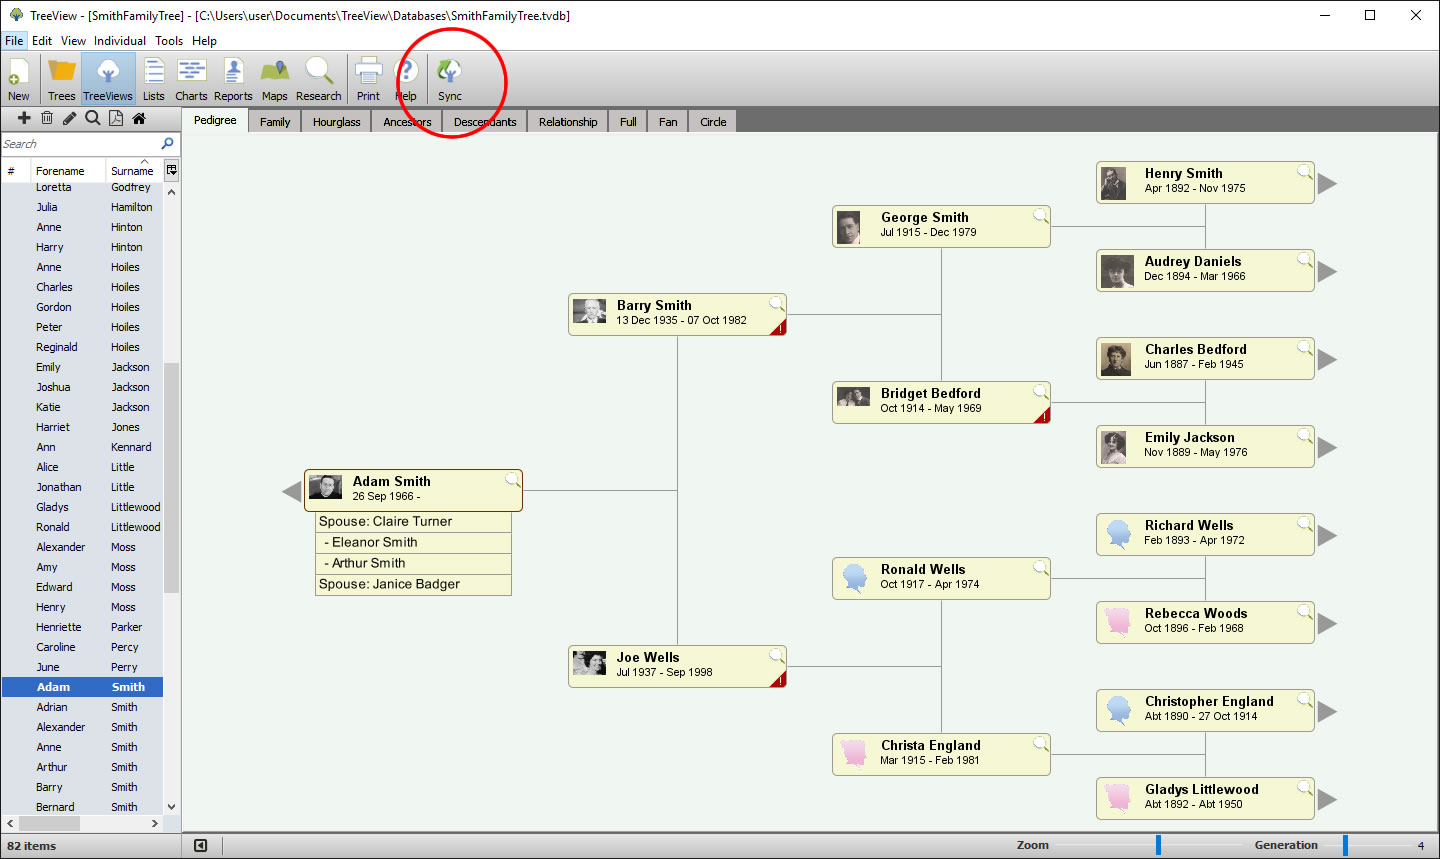
2. Stay in sync
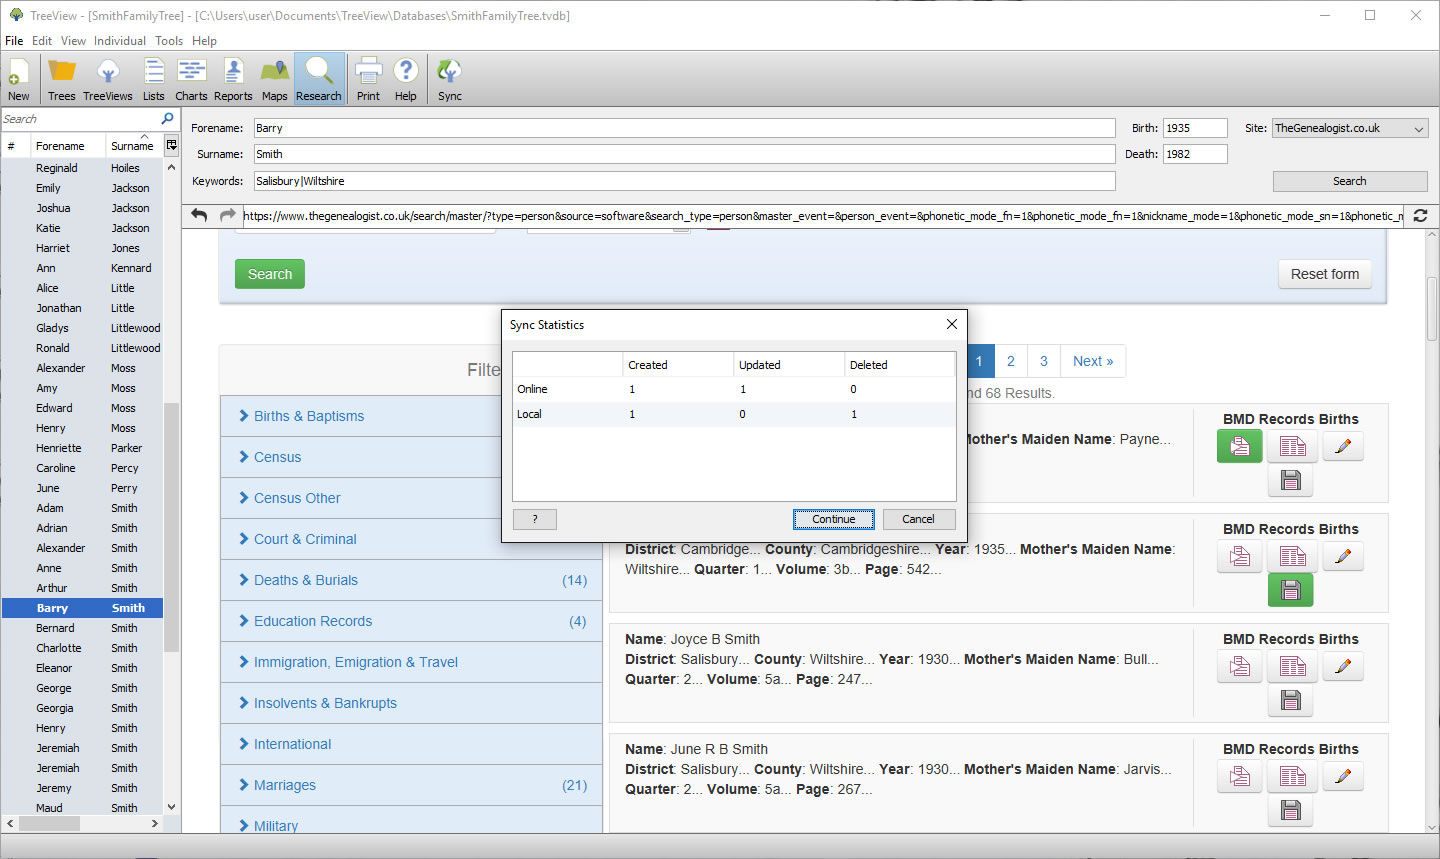
Once everything is downloaded – this can take a while – your tree will appear. Going forward, use the 'Sync' button on the toolbar to merge any changes you make here with your online tree. Also click it to sync changes you make online – either in your browser or via the mobile app.
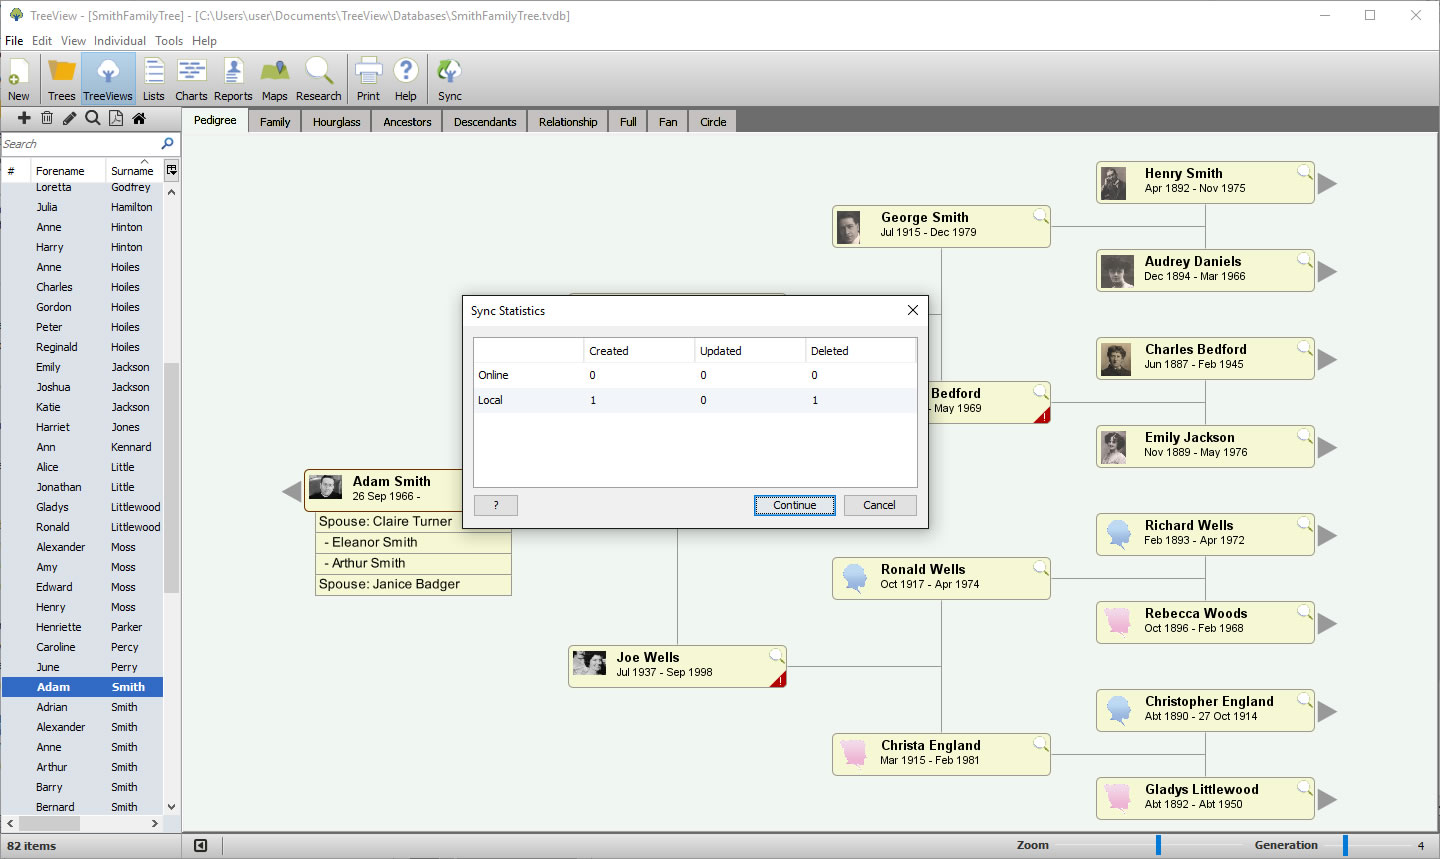
3. Compare changes
Sync statistics reveals the differences between your online and locally stored trees, providing details about the number of new, updated and deleted items. Click 'Continue' to sync your tree and merge changes, including records you've added from TheGenealogist's archives.
4. Find online records
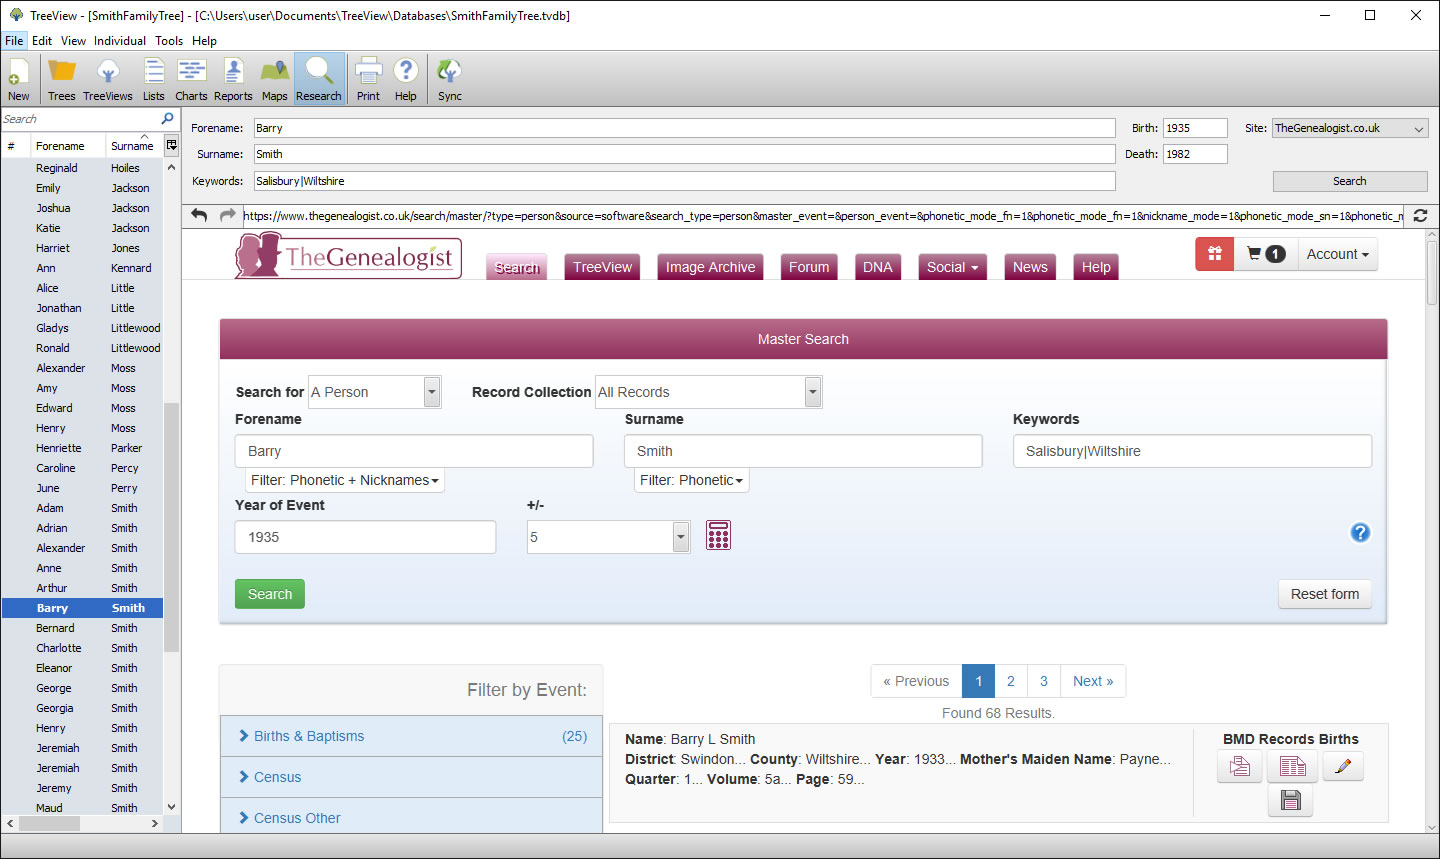
Click 'Research' to search TheGenealogist's archives, or the magnifying glass next to a person in your tree to pre-fill the search boxes – name, keywords, birth and death dates – with their details. If entering keywords, separate each one with the | character, then click 'Search'.
5. Review results
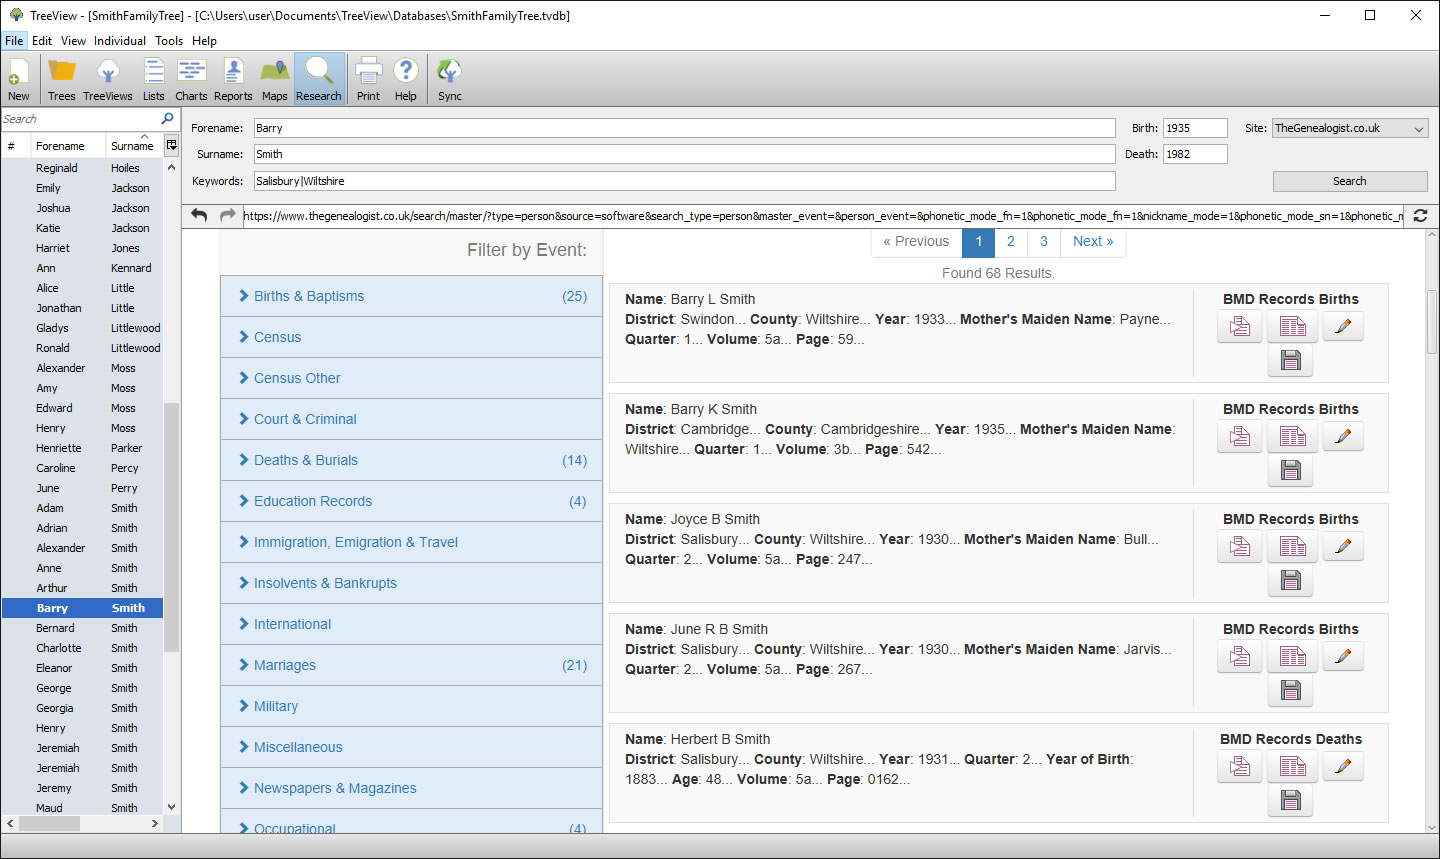
Scroll down the page to see matching results. If none is found, adjust the search terms or leave out certain information (birth or death dates) to see if it produces more potential hits. Use the top two buttons to the right of the record to review its content to see if it's a match.
6. Attach to tree
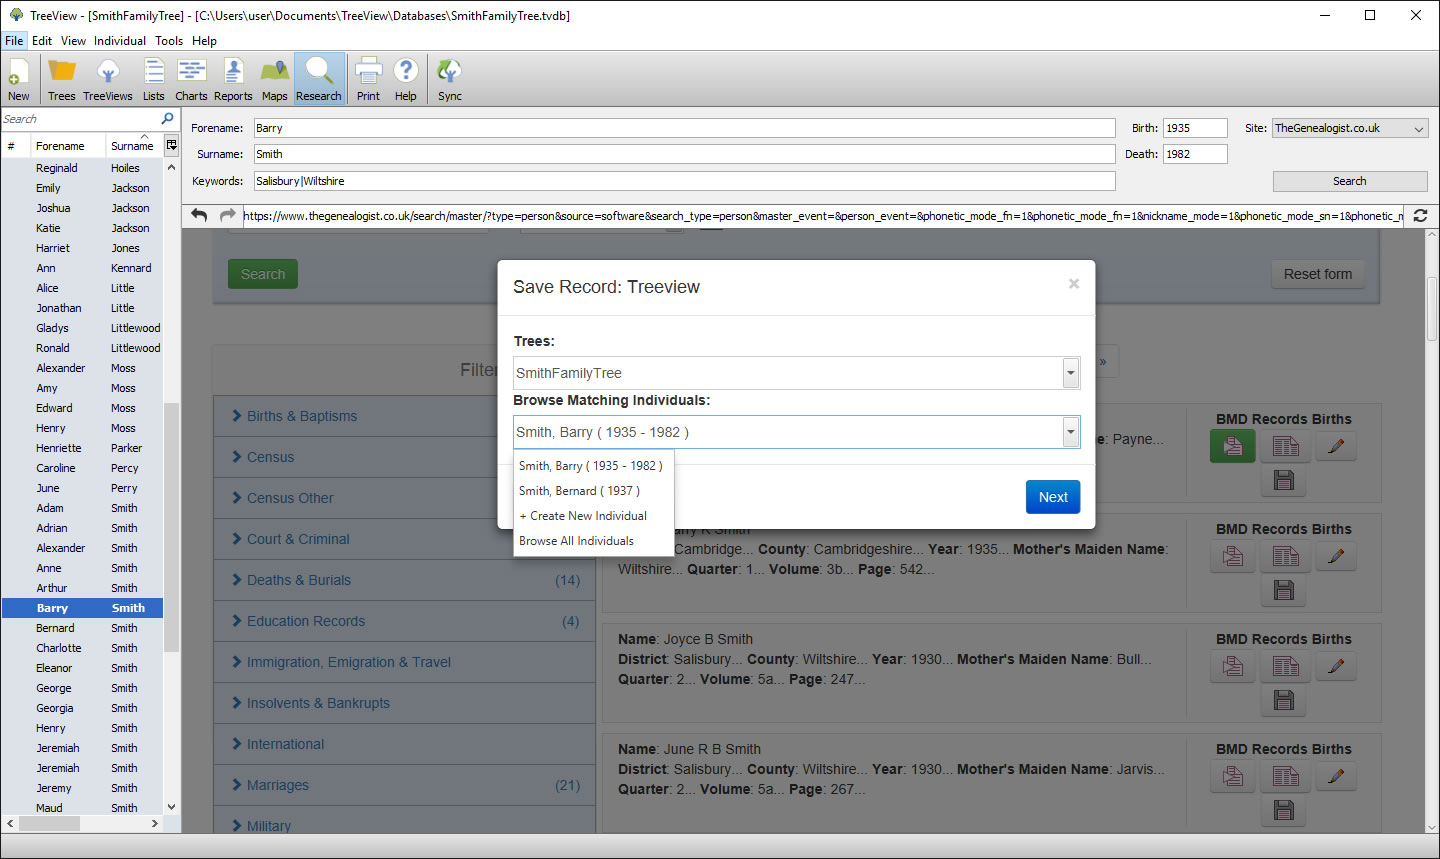
Click the floppy disk icon - you can save the record to your research log, but choose 'In TreeView' to link it to your tree. Select the specific tree to save it to, plus choose which person to attach it to if the correct one hasn't been identified. Click 'Next' to review the details.
7. Review information
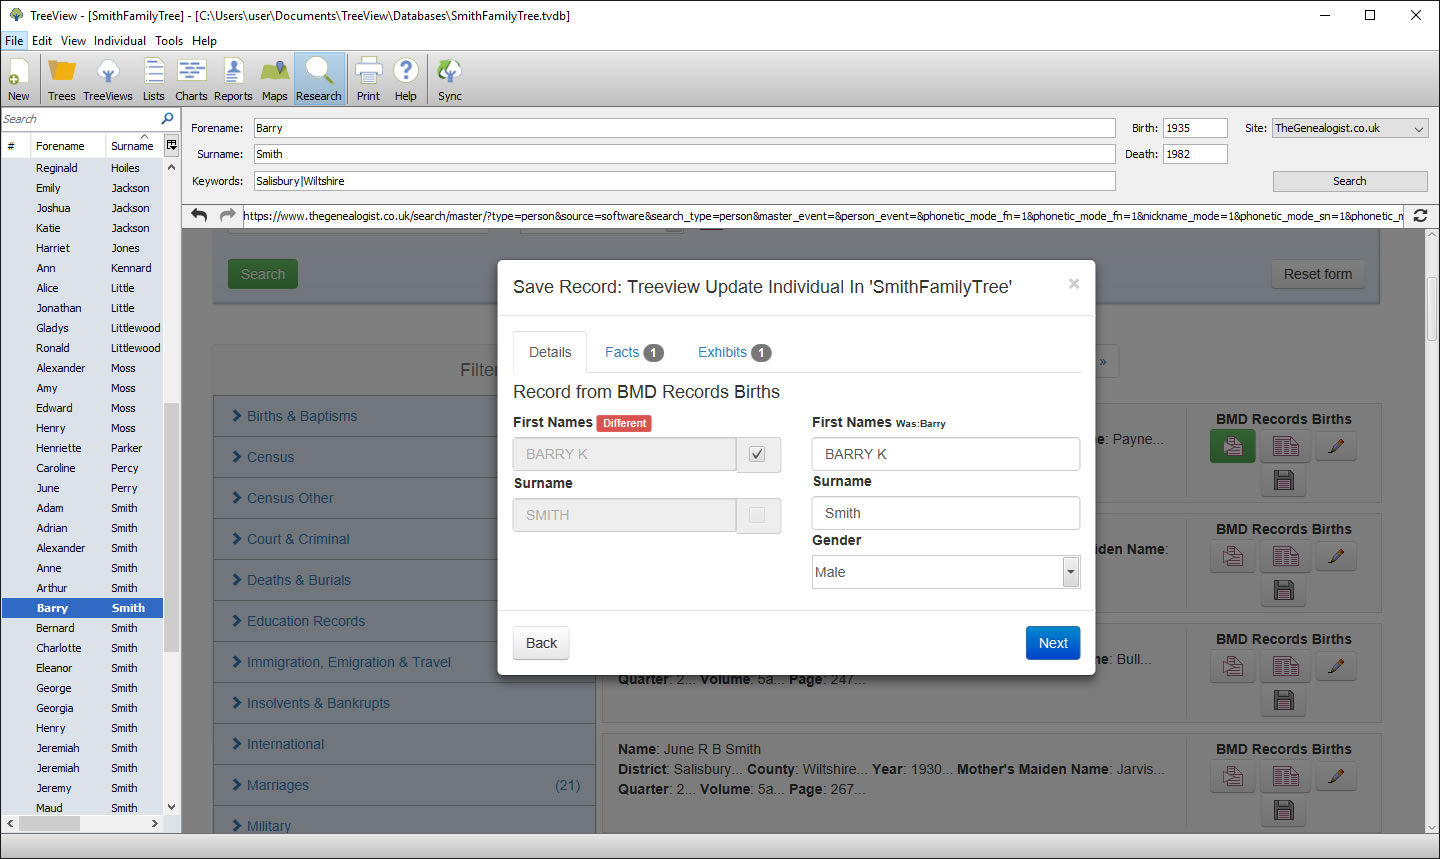
TreeView will extract three types of information from the record: the core details (name and gender), associated facts (such as birth, census and occupation) and finally an exhibit – the actual record title itself. Once done, click 'Next' to upload it to your tree.
8. Sync offline
The record is also added to your research log – if you attempt to merge it again, look out for a reference to it, reminding you it's already been used. Repeat for other documents you wish to save. These are saved to your online tree – click 'Sync' in TreeView to download them